How to create a Python Translator with IBM Watson™ (deprecated).
By Giuseppe Maccario on Sun Jan 26 in Programming, Python
Introduction
IBM is announcing the deprecation of the IBM Watson® Language Translator service for IBM Cloud® in all regions. As of 10 June 2023, the Language Translator tile will be removed from the IBM Cloud Platform for new customers; only existing customers will be able to access the product. As of 10 June 2024, the service will reach its End of Support date. As of 10 December 2024, the service will be withdrawn entirely and will no longer be available to any customers.
Release notes for Language Translator
In this article, I’ll explain how to create a Python Translator with IBM Watson™ Language Translator.
A couple of weeks ago I was looking for an online API service for translations, preferably with a free quota. As result, I created a Python translator with IBM Watson™ Language Translator.
Python Translator with IBM Watson™ free quota
With a Lite subscription you can get a free quota. Here the details:
1,000,000 characters per month at no cost and includes the default translation models. When you upgrade to a paid plan, you can create custom models.However, you can choose other plans, for instance, the Lite, the Standard, the Advanced, or the Premium. However, you can check here the pricing plan page by yourself.
Create an IBM account
Firstly, you must create your account and then login to the service.
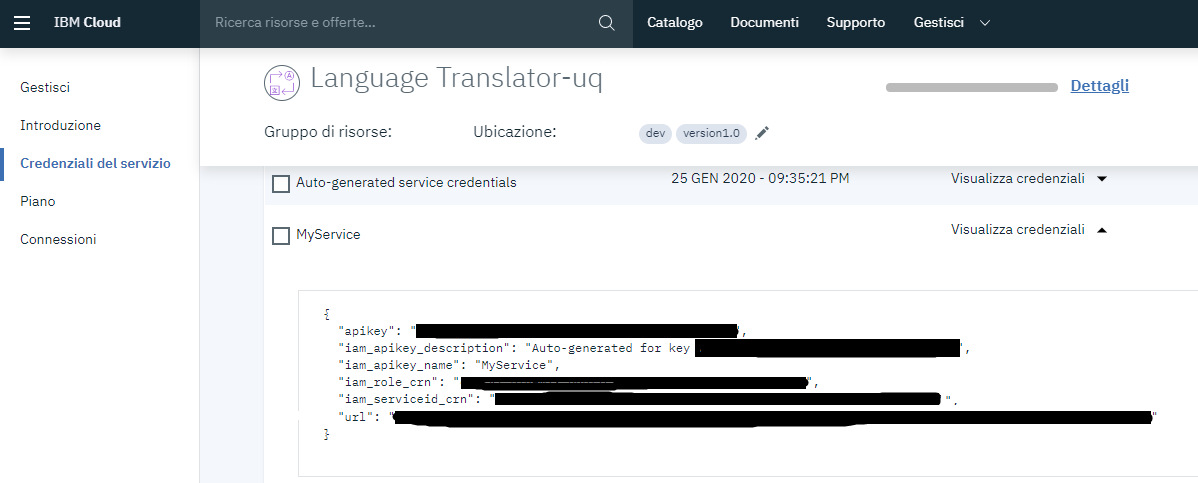
At this point, you should be able to get your credentials. In the past, IBM provided usernames and passwords while nowadays you get your API key and your URL.
Python to build a Translator with IBM Watson™
In this paragraph, I am going to explain the Python code I used to build the Python Translator.
We are going to use a client library to quickly get started with the various Watson APIs services.
Simple installation with pip:
pip3 install --upgrade "ibm-watson>=4.2.1"I used pip3, depending on the installed version on your machine, your command could be:
pip install --upgrade "ibm-watson>=4.2.1"Now, create a new Python file inside your project folder, copy and paste the code below, and check the comments.
import json
from ibm_watson import LanguageTranslatorV3
from ibm_cloud_sdk_core.authenticators import IAMAuthenticator

# Set some variables
api_key = '<your-apikey>'
api_url = '<your-url>'
model_id = 'en-it'
text_to_translate = 'Your content you want translate here'

# Prepare the Authenticator
authenticator = IAMAuthenticator(api_key)
language_translator = LanguageTranslatorV3(
    version='2018-05-01',
    authenticator=authenticator
)

language_translator.set_service_url(api_url )

# Translate
translation = language_translator.translate(
    text=text_to_translate,
    model_id=model_id).get_result()

# Print results
print(json.dumps(translation, indent=2, ensure_ascii=False))
Change <your-apikey> and <your-url> with your personal credentials, run the software, and get your results.
Here the IBM provide Watson™ documentation: https://cloud.ibm.com/apidocs/language-translator/language-translator?code=python#translate
Conclusion
In conclusion, it’s very easy to get a new IBM account and start practicing with automatic translations. IBM provides Watson™ Language Translator, but you can choose other services, such as:
Tip: In addition, to play with IBM Watson™ Language Translator I dockerized my application using the official image, pull it from the Docker Hub. New to Docker? Take a look at how I built a weather web app using Docker and some web technologies.